Home/Home Sushi Kit
Making Sushi at home?
We have home sushi kit.
A curated kit of the exact ingredients Keita recommends — freshly milled Japanese rice, pre-mixed Sushizu, small-batch Shoyu, crisp Nori, and wasabi. Pair it with any fish from the shop for a complete home omakase. Items may vary based on availability.
$50
Pickup or delivery · DC, MD, VA
Same-day delivery to Bethesda, Rockville, Potomac, Silver Spring, Arlington, McLean, and across the DC metro area.
Add to order
How to use it →
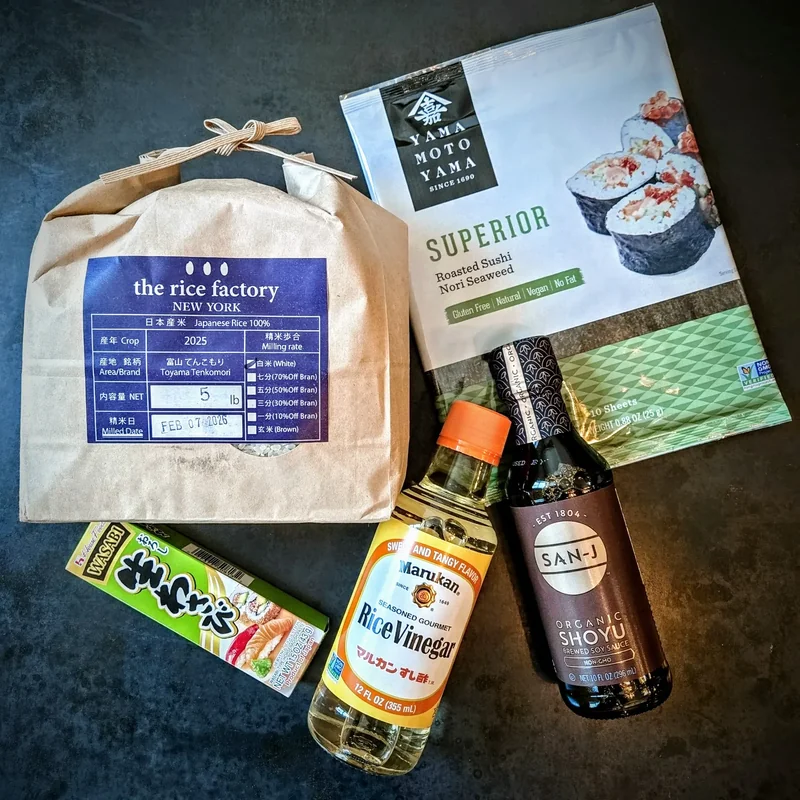
What is the Sashimi DC Home Sushi Kit?
The Home Sushi Kit ($50) includes premium Japanese short-grain rice (freshly milled), Sushizu (pre-balanced seasoned rice vinegar), small-batch Shoyu, roasted sushi Nori (10 sheets), and wasabi paste — everything except the fish. Available for same-day delivery across DC, MD, and VA — including Bethesda, Rockville, Silver Spring, Arlington, and McLean — or pickup at 1608 14th St NW. Order fish separately at shop.sashimidc.com. $30 minimum; enter your address at checkout to confirm delivery coverage.
Wondering if making sushi at home is worth it vs. going out? Why home sushi beats DC restaurants →
Step by step
How to make perfect sushi rice.
Shari (sushi rice) is the foundation of everything. Getting it right is mostly a matter of two things: using slightly less water than normal, and seasoning immediately while the rice is still hot.
-
1
Wash and soak — 30 min
Rinse 2 cups of rice in cold water, gently stirring until the water runs mostly clear — 3 to 4 changes. Then soak in fresh cold water for 30 minutes. Soaked rice cooks more evenly and produces a better texture for sushi.
-
2
Cook with slightly less water
Drain the soaked rice and transfer to a rice cooker or heavy pot. Add water filled 2–3mm below the standard line for that quantity. This slight reduction keeps the grains firm and separate rather than soft and sticky — exactly what you need for Temaki and nigiri.
-
3
Season immediately with Sushizu
The moment the rice is done, transfer it to a wide flat bowl — a wooden hangiri is ideal but any wide bowl works. Pour 60ml of Sushizu over the surface (the correct amount for 2 cups of uncooked rice). Fold in with a rice paddle using a cutting motion — do not stir or mash. Fan the rice at the same time to cool it quickly and develop a glossy finish. Stop when rice reaches body temperature.
The cutting-and-fanning motion is what gives sushi rice its characteristic sheen. Stirring breaks the grains and makes the rice gluey. Take your time with this step — it takes about 4 minutes and is the most important part.
-
4
Cut the Nori — just before serving
Cut Nori sheets into quarters with kitchen shears at the table, just before eating. Nori absorbs moisture from the air — pre-cutting it 30 minutes in advance is the most common cause of soggy hand rolls.
-
5
Assemble and eat immediately
Place a small loosely packed amount of sushi rice on one piece of Nori. Add a slice of fish and a tiny amount of wasabi placed directly on the fish — not mixed into the soy sauce. Wrap loosely into a cone shape, dip lightly in Shoyu, and eat within 20–30 seconds. Once rice touches Nori, the clock starts. The crispness of the Nori is part of the experience — do not wait. For slicing technique, nigiri, and the full step-by-step with fish, see the complete home sushi guide.
Details that matter
Tips from Keita.
🔪
Sharp knife, single stroke
Sashimi should be sliced in one clean pull — not sawed. A dull knife tears the fish and damages texture. We offer knife sharpening in-store for customers. Bring yours when you pick up your order.
🍣
Less rice than you think
The most common home sushi mistake is too much rice per hand roll. A Temaki should be about 60% fish and garnish, 40% rice. Pack loosely — do not compress.
🫙
Wasabi on the fish, not in the soy
Mixing wasabi directly into soy kills its volatile compounds instantly. Place a small amount on the fish before wrapping to preserve its delicate heat.
🌡️
Fish at room temperature
Take sashimi-grade fish out of the fridge 10–15 minutes before serving. Fish straight from the fridge suppresses flavor — a slight rest allows the full aroma and umami to come through.
🍶
Serve with sake or wine
Sashimi DC and Rice Market host a free wine and sashimi pairing tasting every Friday–Sunday, 2–7 pm at the shop. Rare bottles — not available elsewhere in DC.
📦
Leftover fish? Don't waste it
Day-two sashimi is perfect for Zuke (soy marinade over rice) or Kobujime (kelp cure). Both recipes with video are on the Recipes page.
Complete the kit
Add fish to your order.
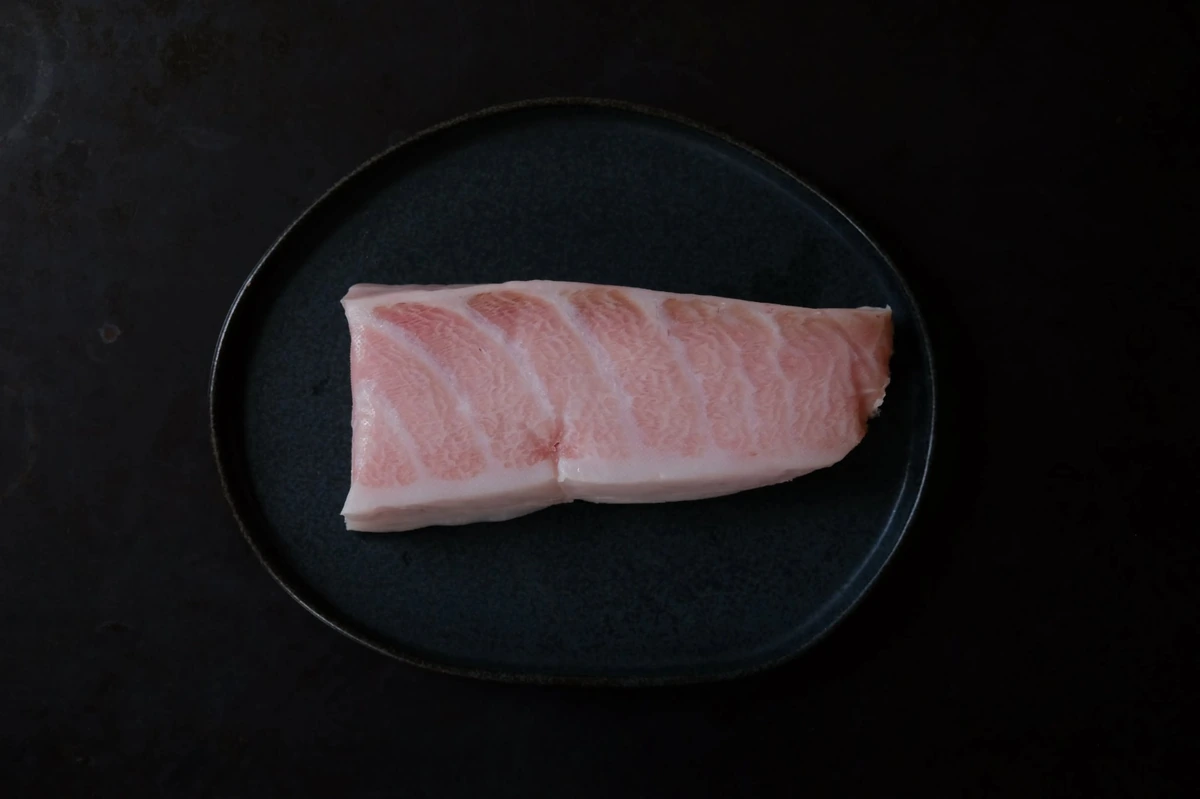
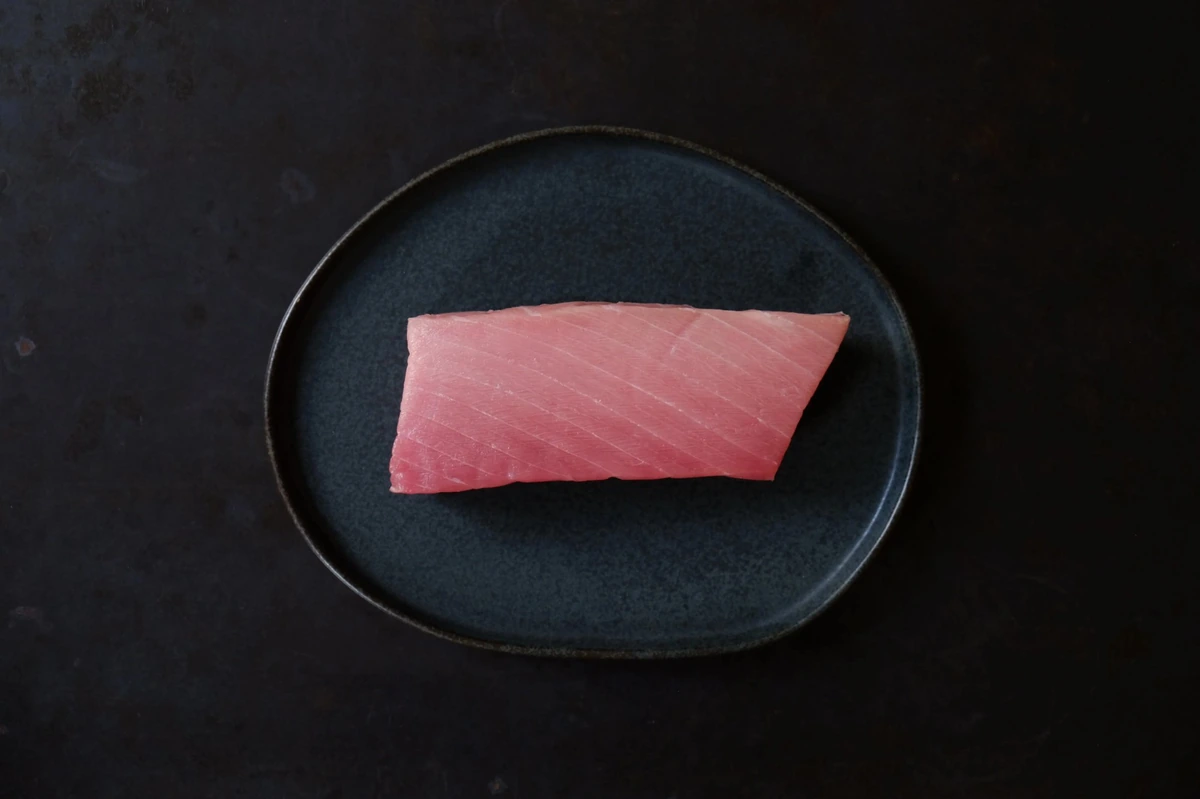
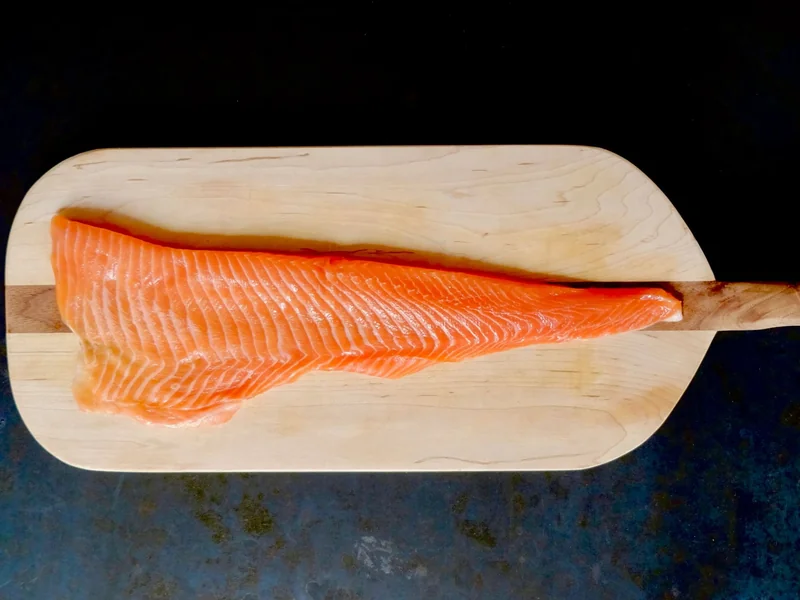
The Kit is designed to pair with any fish from the shop. For a first home omakase, Chutoro and Akami together give the full spectrum of Bluefin flavor — or try the Sasshu Salmon for a crowd-pleasing option alongside tuna.
Is the fish safe for kids?
Sasshu Salmon and Bluefin Tuna Akami are the recommended starting points for children — both are mild, clean-flavored, and free of the strong odor associated with lower-quality fish. For younger children or those hesitant about raw fish, Unagi Kabayaki (pre-cooked eel) is a crowd-pleasing alternative that requires no raw preparation. Full guide: Sashimi for Families.
What's included in the Sashimi DC Home Sushi Kit?
The kit ($50) contains premium Japanese short-grain rice (freshly milled, milling date stamped on bag), Sushizu (pre-balanced seasoned rice vinegar — 60 ml per 2 cups rice, no measuring needed), small-batch brewed Shoyu, roasted sushi Nori (10 sheets), and wasabi paste. Everything except the fish. Items may vary based on availability.
Do I need to buy fish separately?
Yes. The kit covers all pantry items — rice, vinegar, soy sauce, nori, wasabi. Fish is ordered separately at shop.sashimidc.com/sashimi. Kagoshima Salmon and Bluefin Tuna Akami are the most popular pairings. Both can be ordered same-day for delivery alongside the kit.
How much sushi rice does the kit make?
The kit includes a 5 lb bag of short-grain Japanese rice (approximately 12 cups uncooked). Three to four cups of uncooked rice is sufficient for a sushi dinner for four people. The Sushizu ratio is 60 ml per 2 cups of uncooked rice — no measuring required, the bottle is pre-balanced.
Is the Home Sushi Kit good for a family sushi night with kids?
Yes — this is one of the most popular ways families use Sashimi DC. Temaki (hand rolls) require no special equipment or knife skills, and children from age 5 or 6 can participate. Sasshu Salmon and Bluefin Tuna Akami are the best starting points for children new to raw fish — both mild and clean-flavored. Full guide: sashimidc.com/sashimi-for-families-washington-dc
Can I get the Home Sushi Kit delivered to Bethesda, Rockville, Silver Spring, or Arlington?
Yes. Same-day delivery runs daily 1–8 pm across DC, Maryland (Bethesda, Rockville, Silver Spring, Potomac, Chevy Chase, Takoma Park, and more), and Virginia (Arlington, McLean, Alexandria, Fairfax, Vienna, Falls Church, and more). $30 minimum. Enter your address at checkout to confirm coverage.
Can I pick up the kit in store?
Yes. Sashimi DC is at 1608 14th St NW, Lower Level, inside Rice Market, Washington DC 20009. Open daily 11:30 am – 8:00 pm. The kit is available at the fish counter alongside sashimi-grade fish.
Why is Sashimi DC's fish fresher than fish at other stores or restaurants?
Sashimi DC imports directly from the farmer in Nagasaki/Kagoshima and processor in Miyazaki — skipping the exporters, importers, and distributors that typical US seafood passes through. That shorter chain means faster transit and a direct quality line: if packaging, cuts, or cold chain need adjusting, Keita communicates with the processor overnight. The fish reaches your door approximately 48 hours from Miyazaki, never frozen, never CO-treated.
Is the Home Sushi Kit a good gift for Japanese food lovers?
Yes — the Home Sushi Kit ($50) is a popular gift for anyone who loves Japanese food or makes sushi at home. It includes premium short-grain Japanese rice (freshly milled), Sushizu seasoned rice vinegar, brewed soy sauce, roasted sushi nori (10 sheets), and wasabi paste. Pair it with sashimi-grade fish from Sashimi DC — Bluefin tuna, Sasshu Salmon from Kagoshima, or Hokkaido Uni — for a complete home omakase experience. Available for same-day delivery across DC, Maryland, and Virginia, or pickup daily 11:30 am – 8:00 pm at 1608 14th St NW (inside Rice Market).